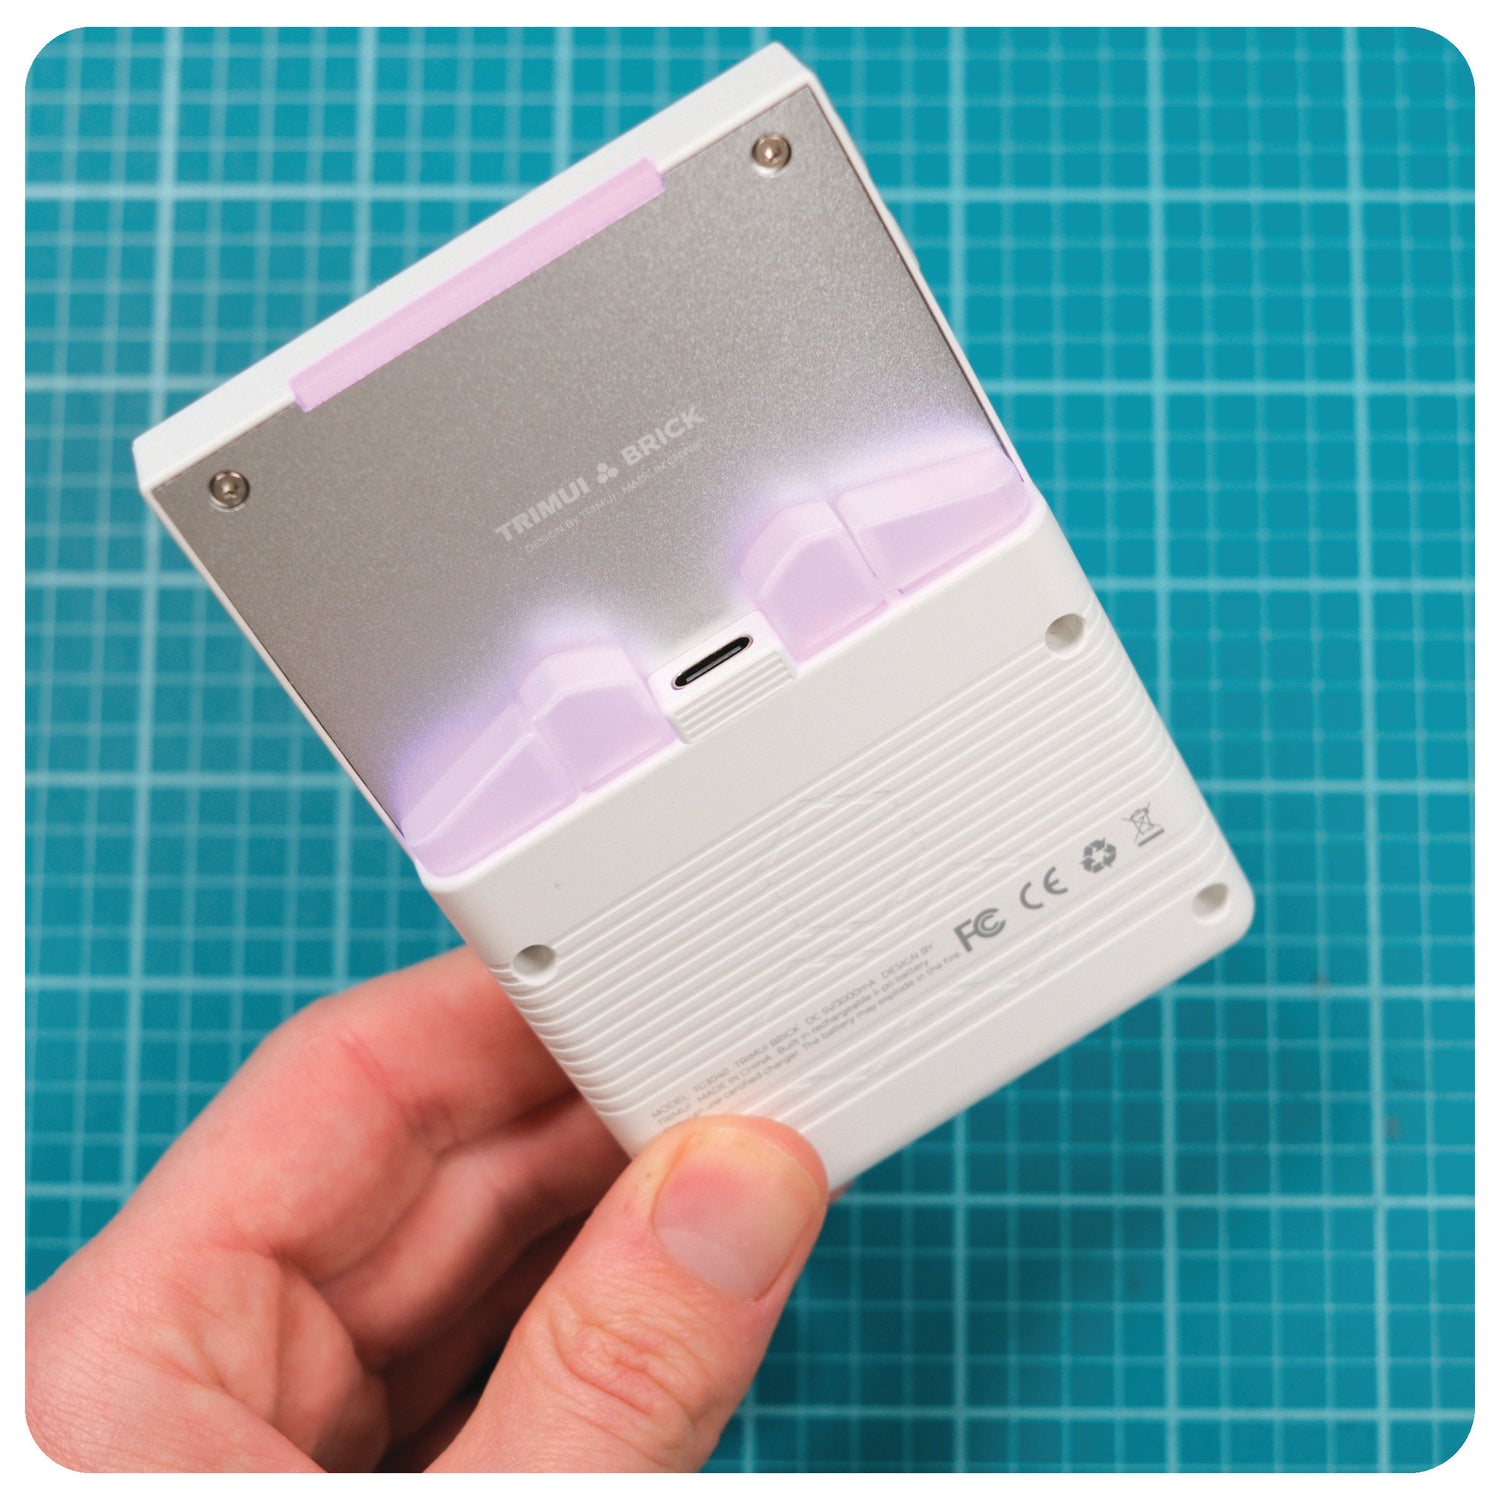
Shoulder Button Install Instructions (& LED Control App)
(TrimUI Brick)
Buttons - Step 1
This part is pretty quick :)
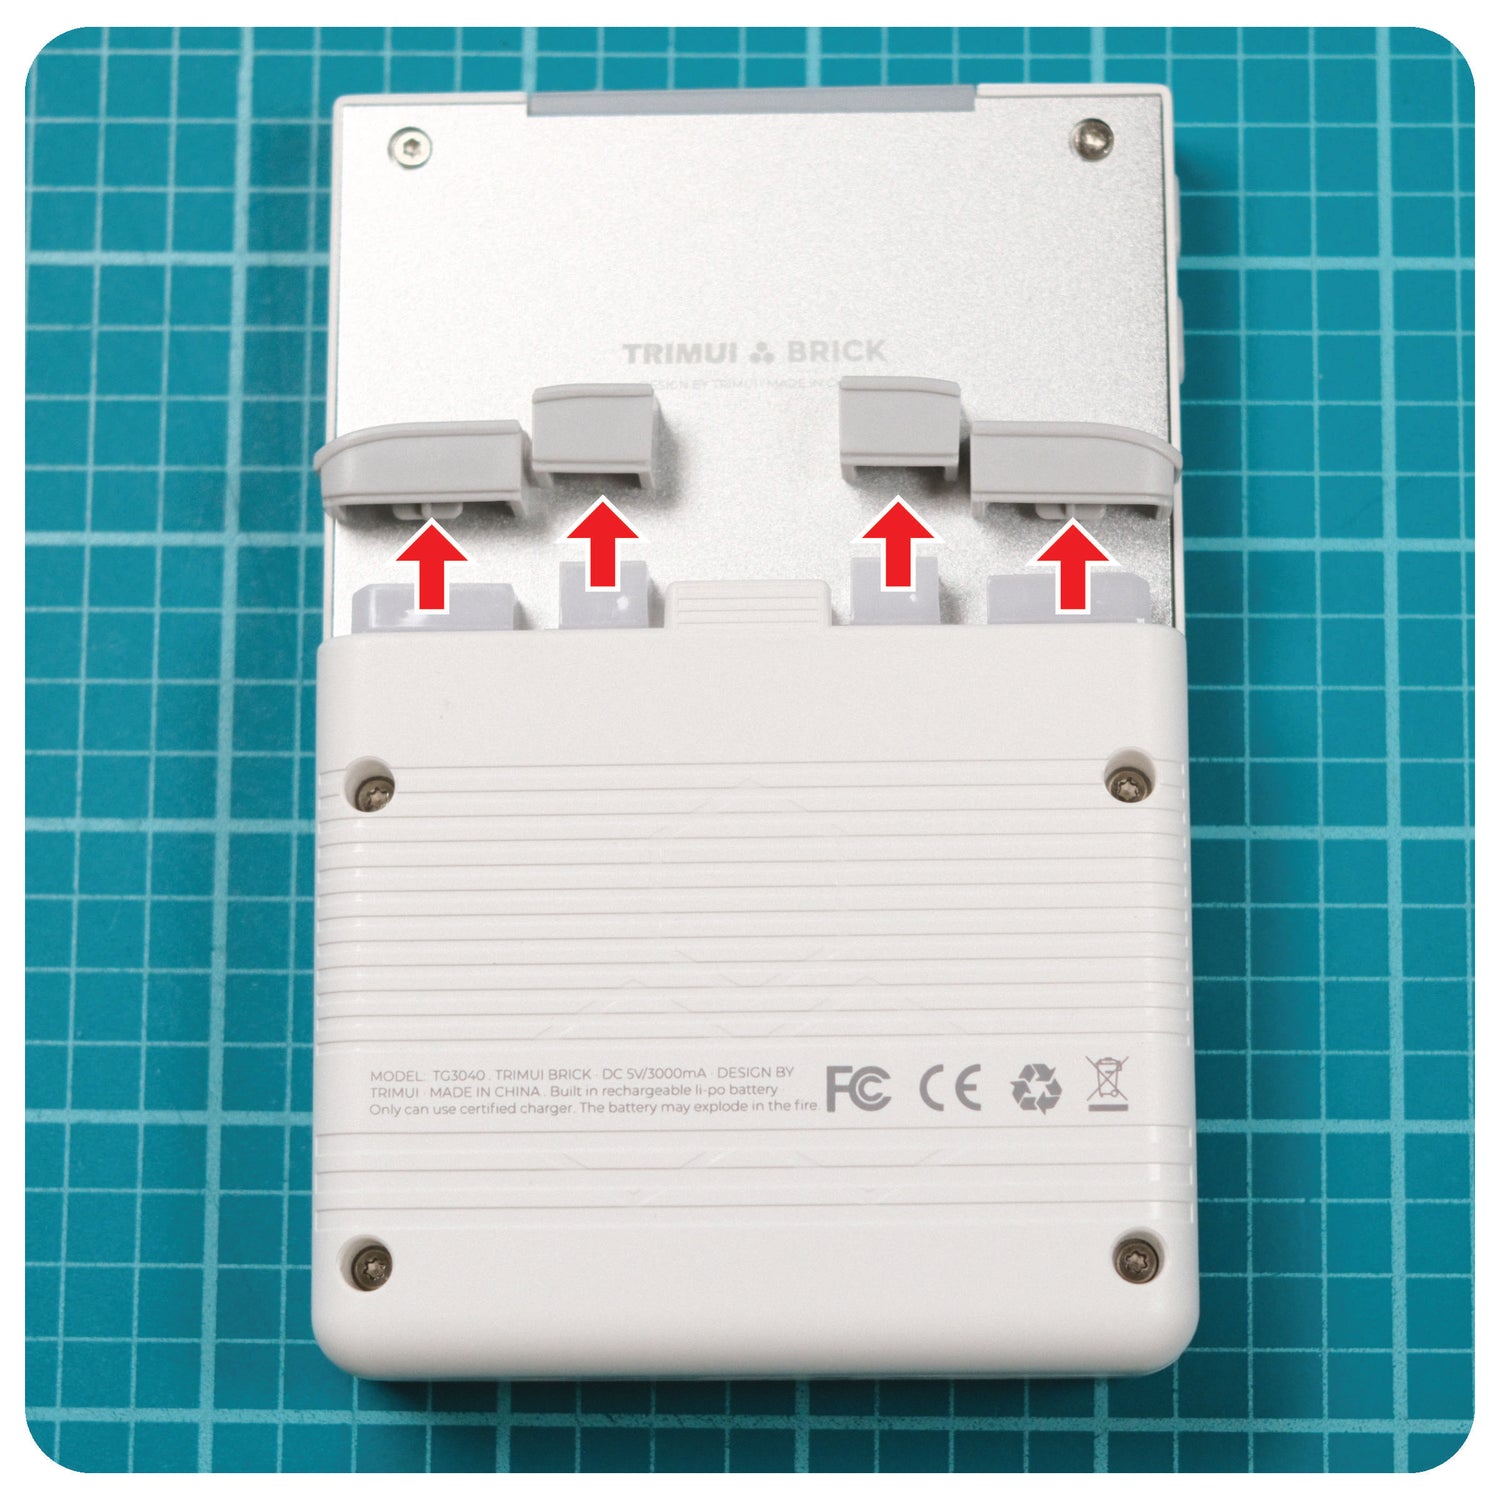
First, lay a soft cloth down on your table (so you don't scratch the screen). Place the device upside down on the cloth.
Remove the stock shoulder buttons by pulling straight up on them as shown in the image. It may be a little difficult at first.
Set the buttons aside.
Buttons - Step 2
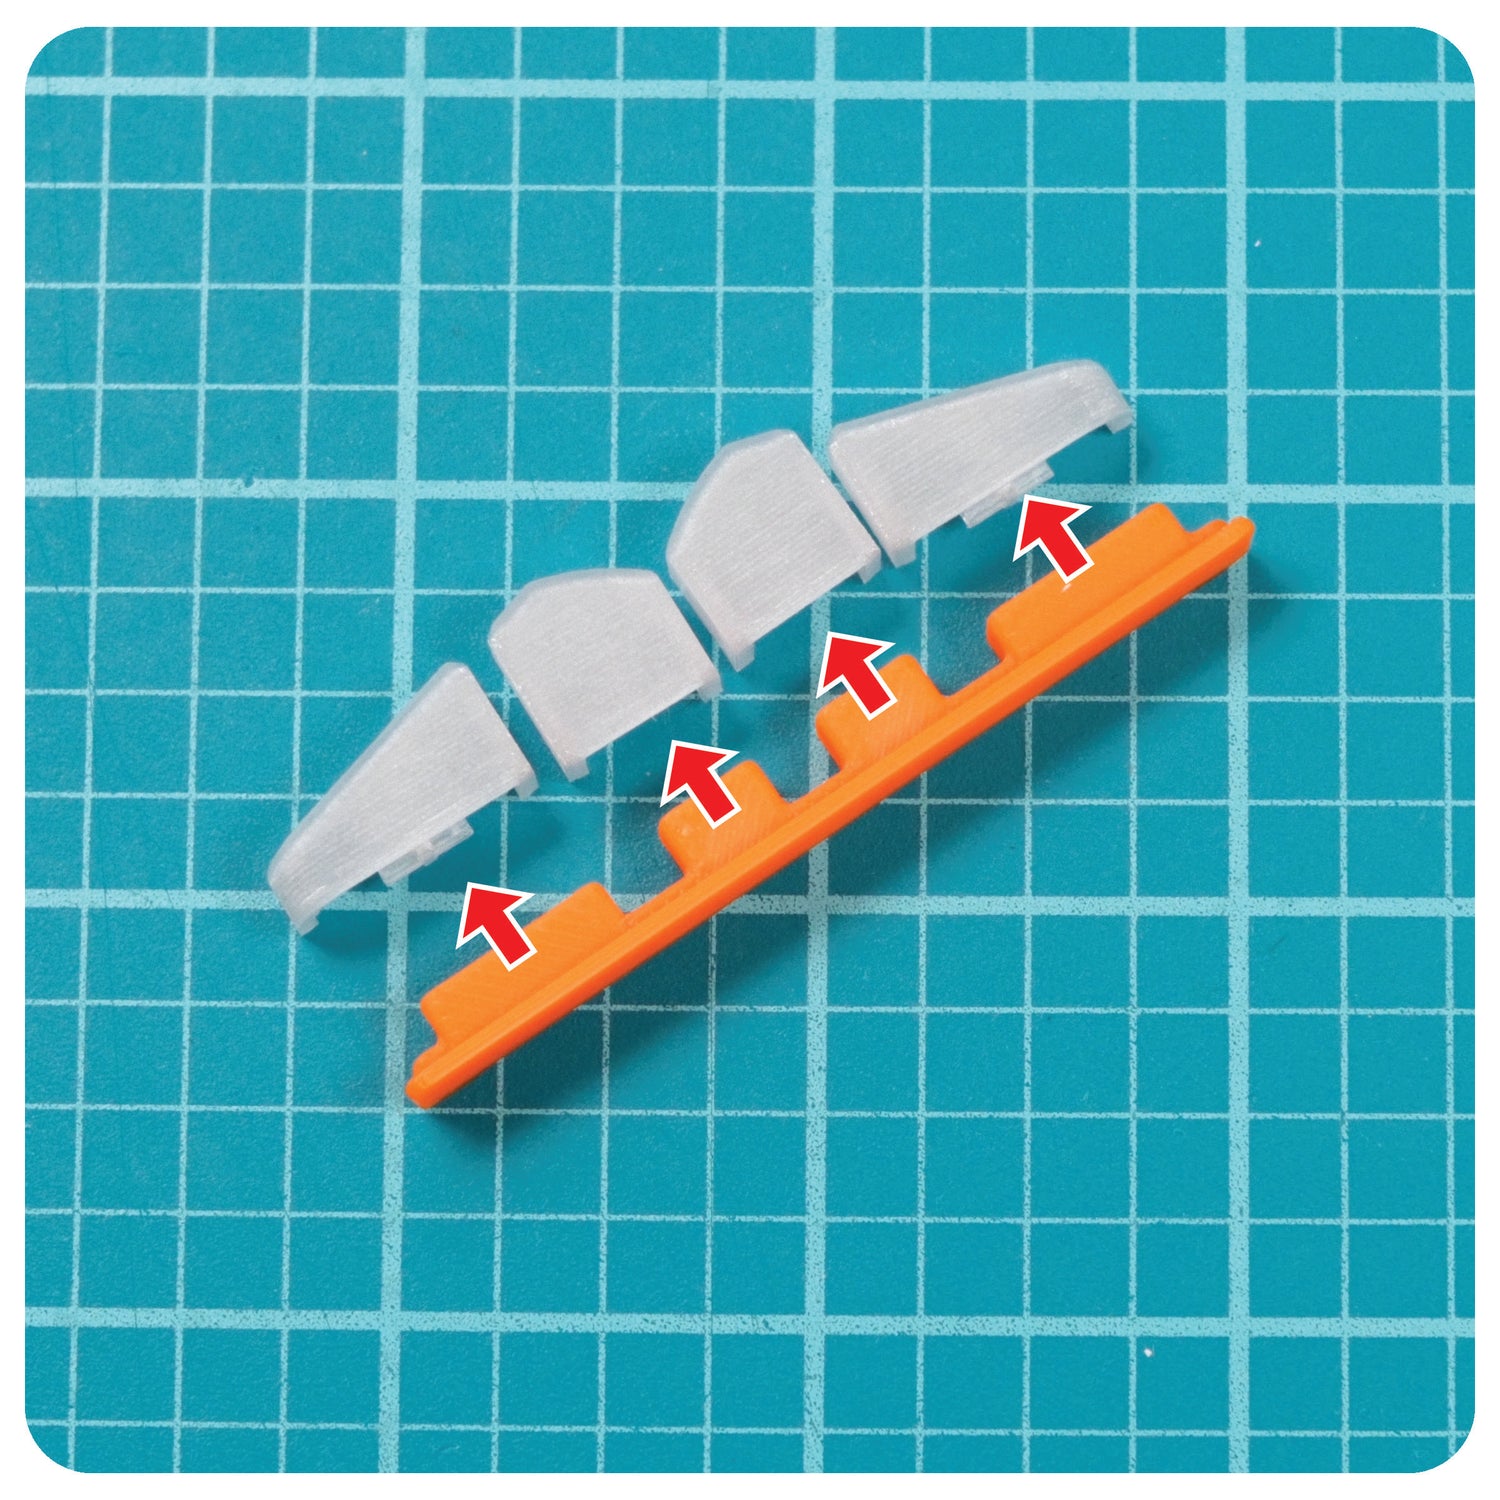
Remove the RCW Transparent Shoulder Buttons from the storage mount using the same method (by pulling straight up).
Hint: the original buttons can be neatly stored on this storage mount too, don't throw it away! :)
Buttons - Step 3
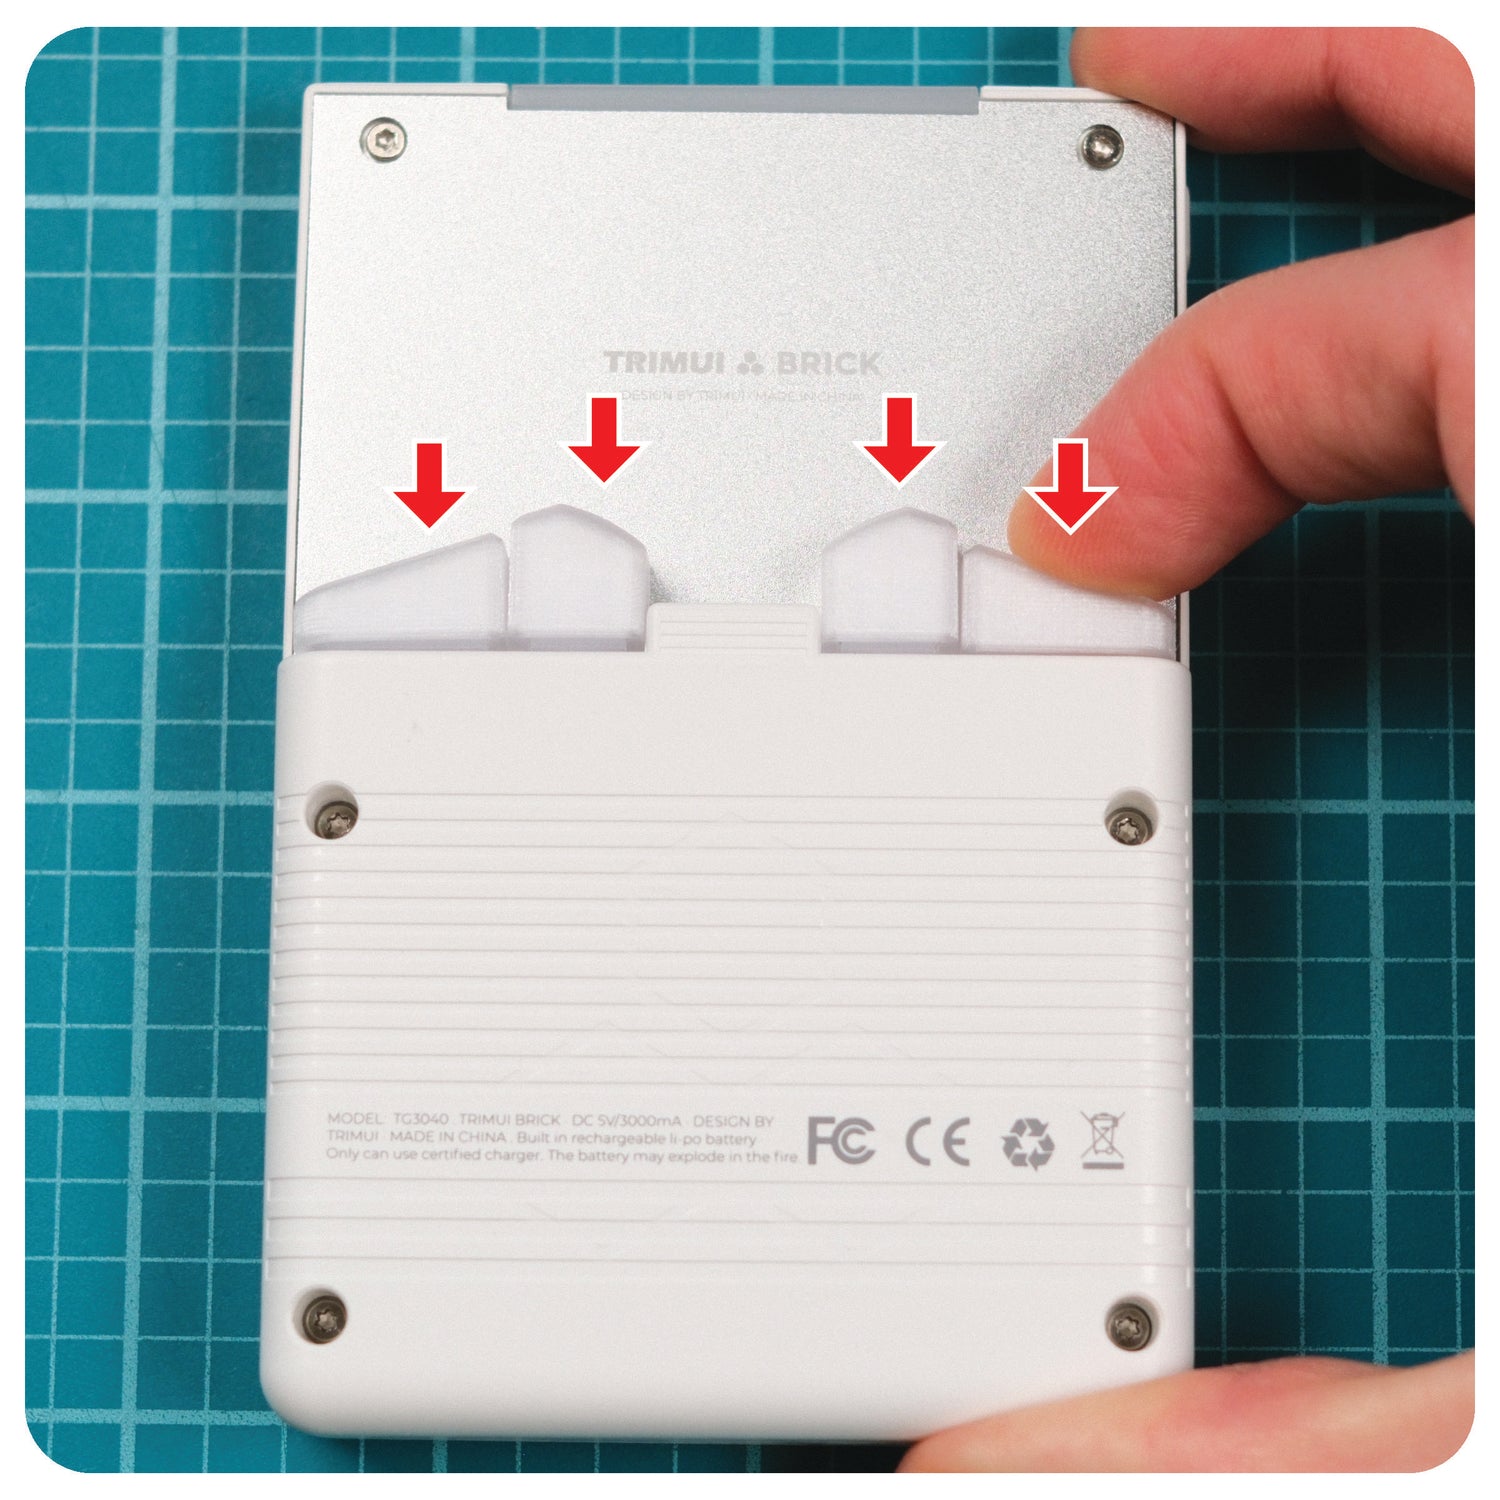
Gently push the Transparent Buttons into place untill they are fully seated, being sure to match the correct orientation!
They may be tight the first time you use them, this is normal.
If the buttons don't go down all the way, gently wiggle them while pushing down, or remove them and try again.
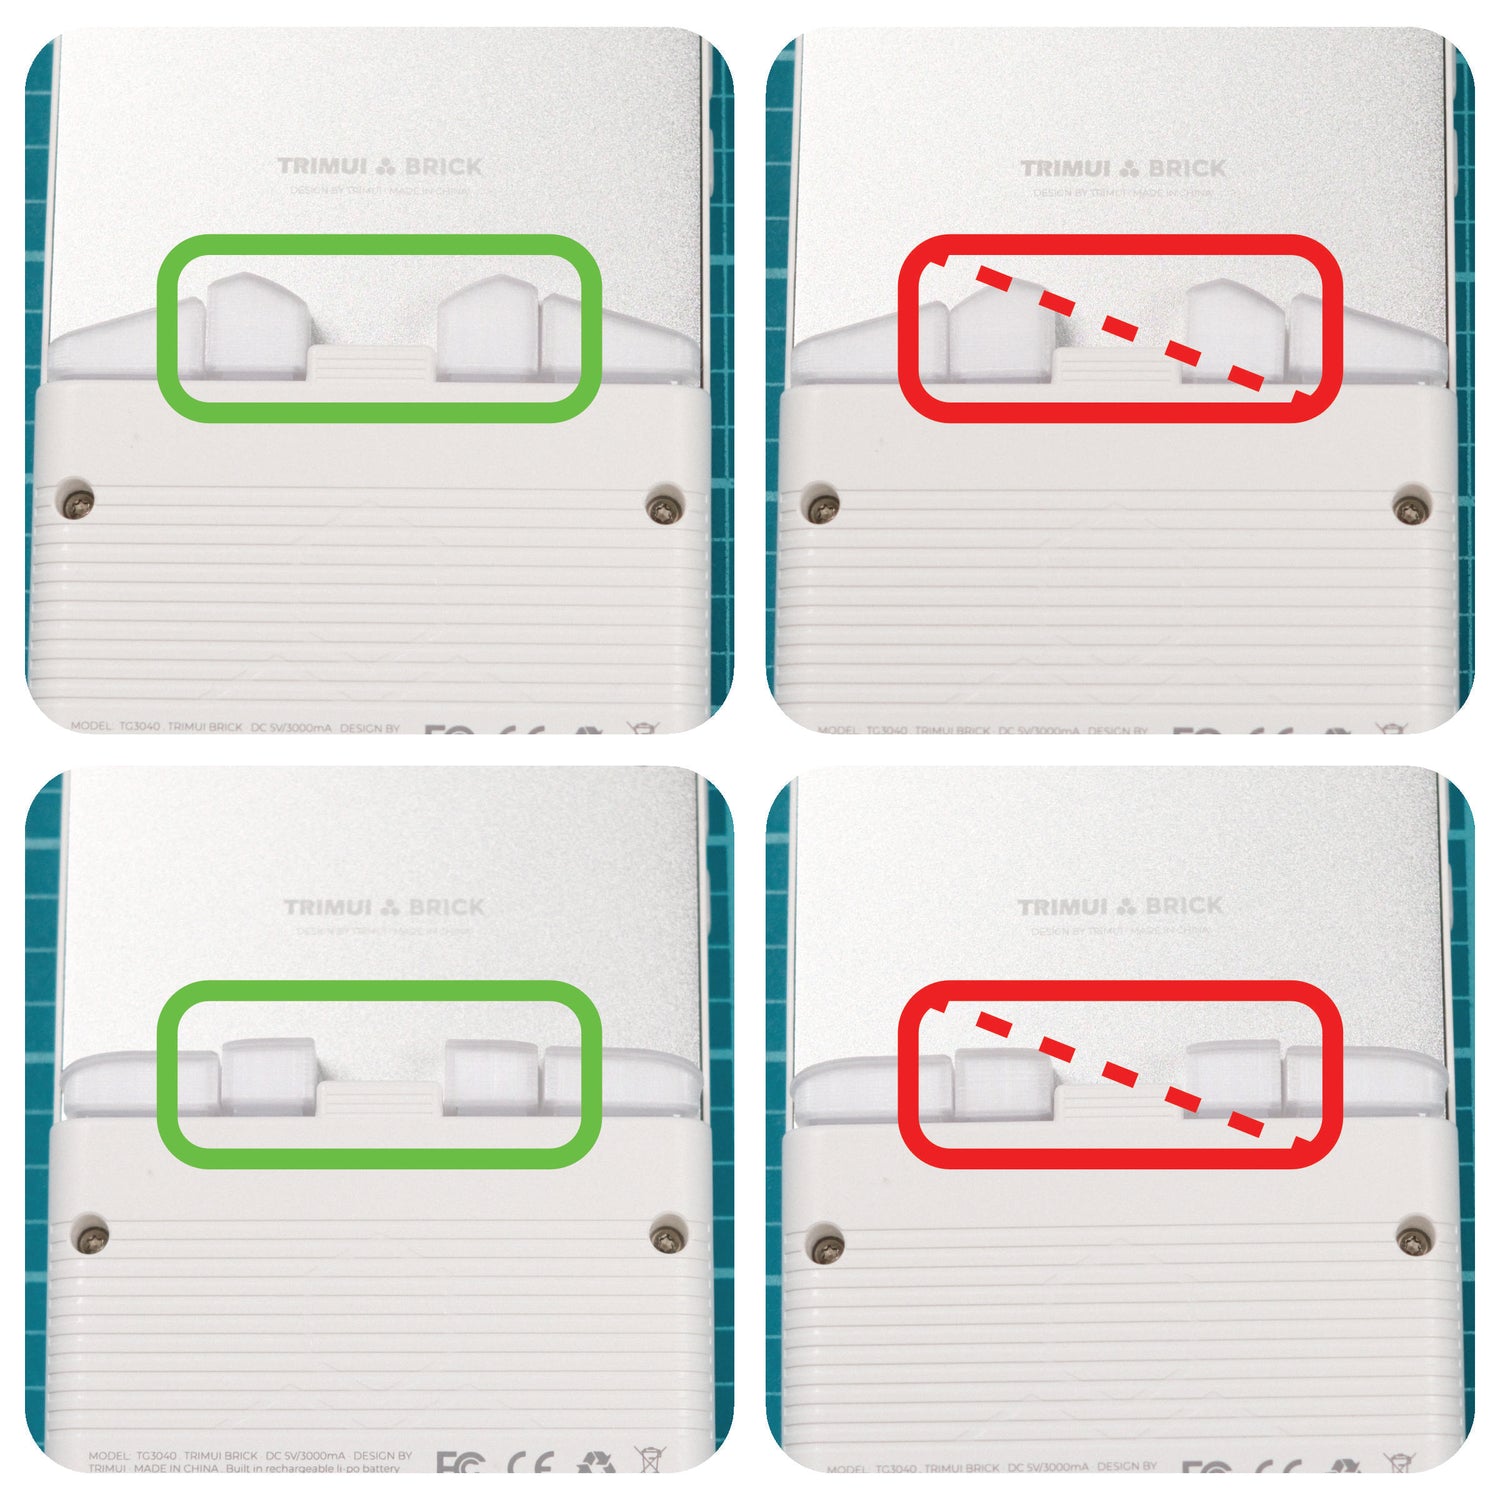
Buttons - Step 4
⚠️ Be sure you used the right orientation, otherwise the buttons will stick! Pay close attention to the orientation of the L2 and R2 buttons!
Now that the buttons are in place, we will continue on to the optional step of installing an app on the TrimUI Brick to unlock more LED colors and customization!
Reach out to me if you need any help!
Contact me
App - Step 1
If you want more RGB LED color control, there are a few ways to make this happen!
We will go over the simplest way, which is installing a 3rd party app made by a community member called LedControl. It's free, and installing is simply a matter of dragging a file onto the TruimUI Brick SD card.
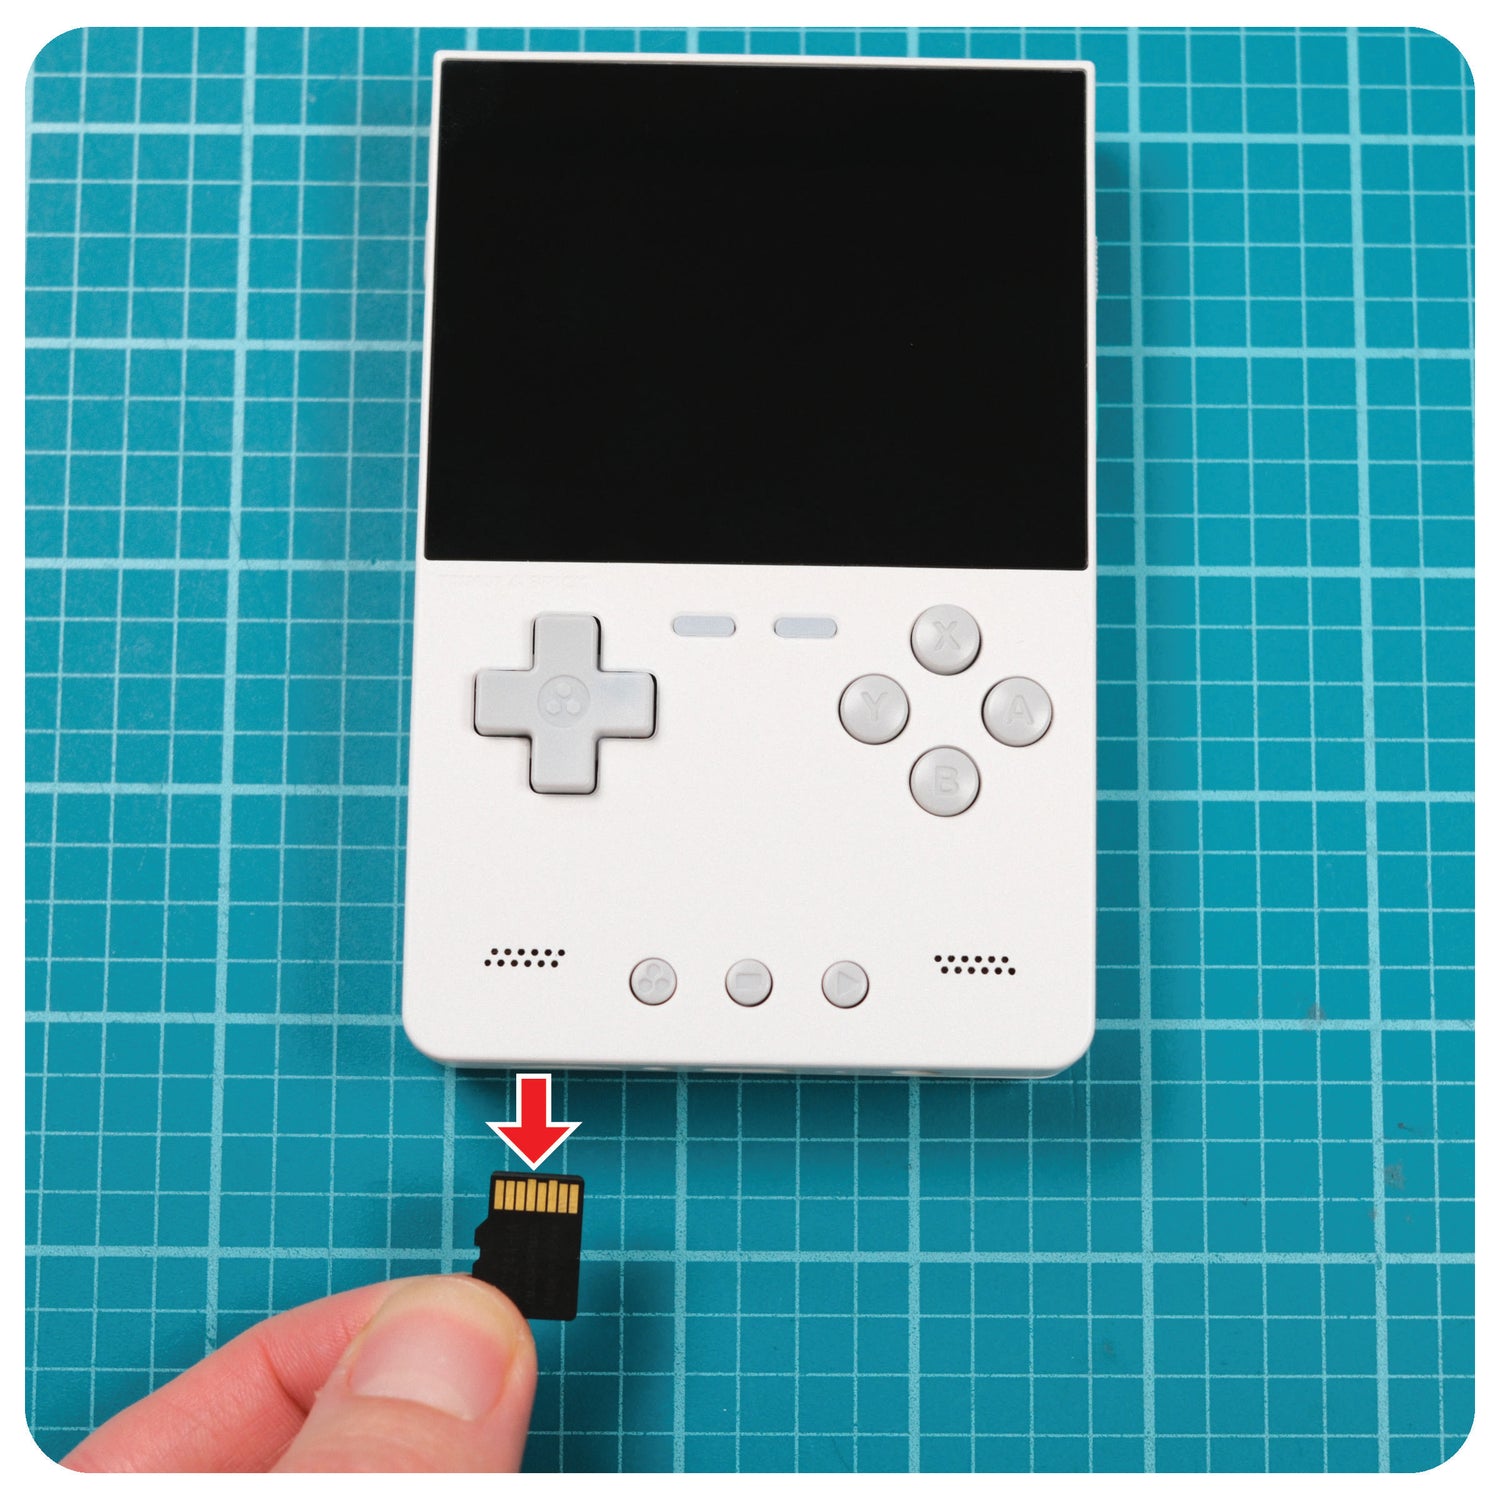
First, turn off your TrimUI Brick and remove the SD card.
Alternative Options: If you would rather explore other more advanced options like replacing the entire OS and still getting better LED control, here are some links to NextUI or PakUI
App - Step 2
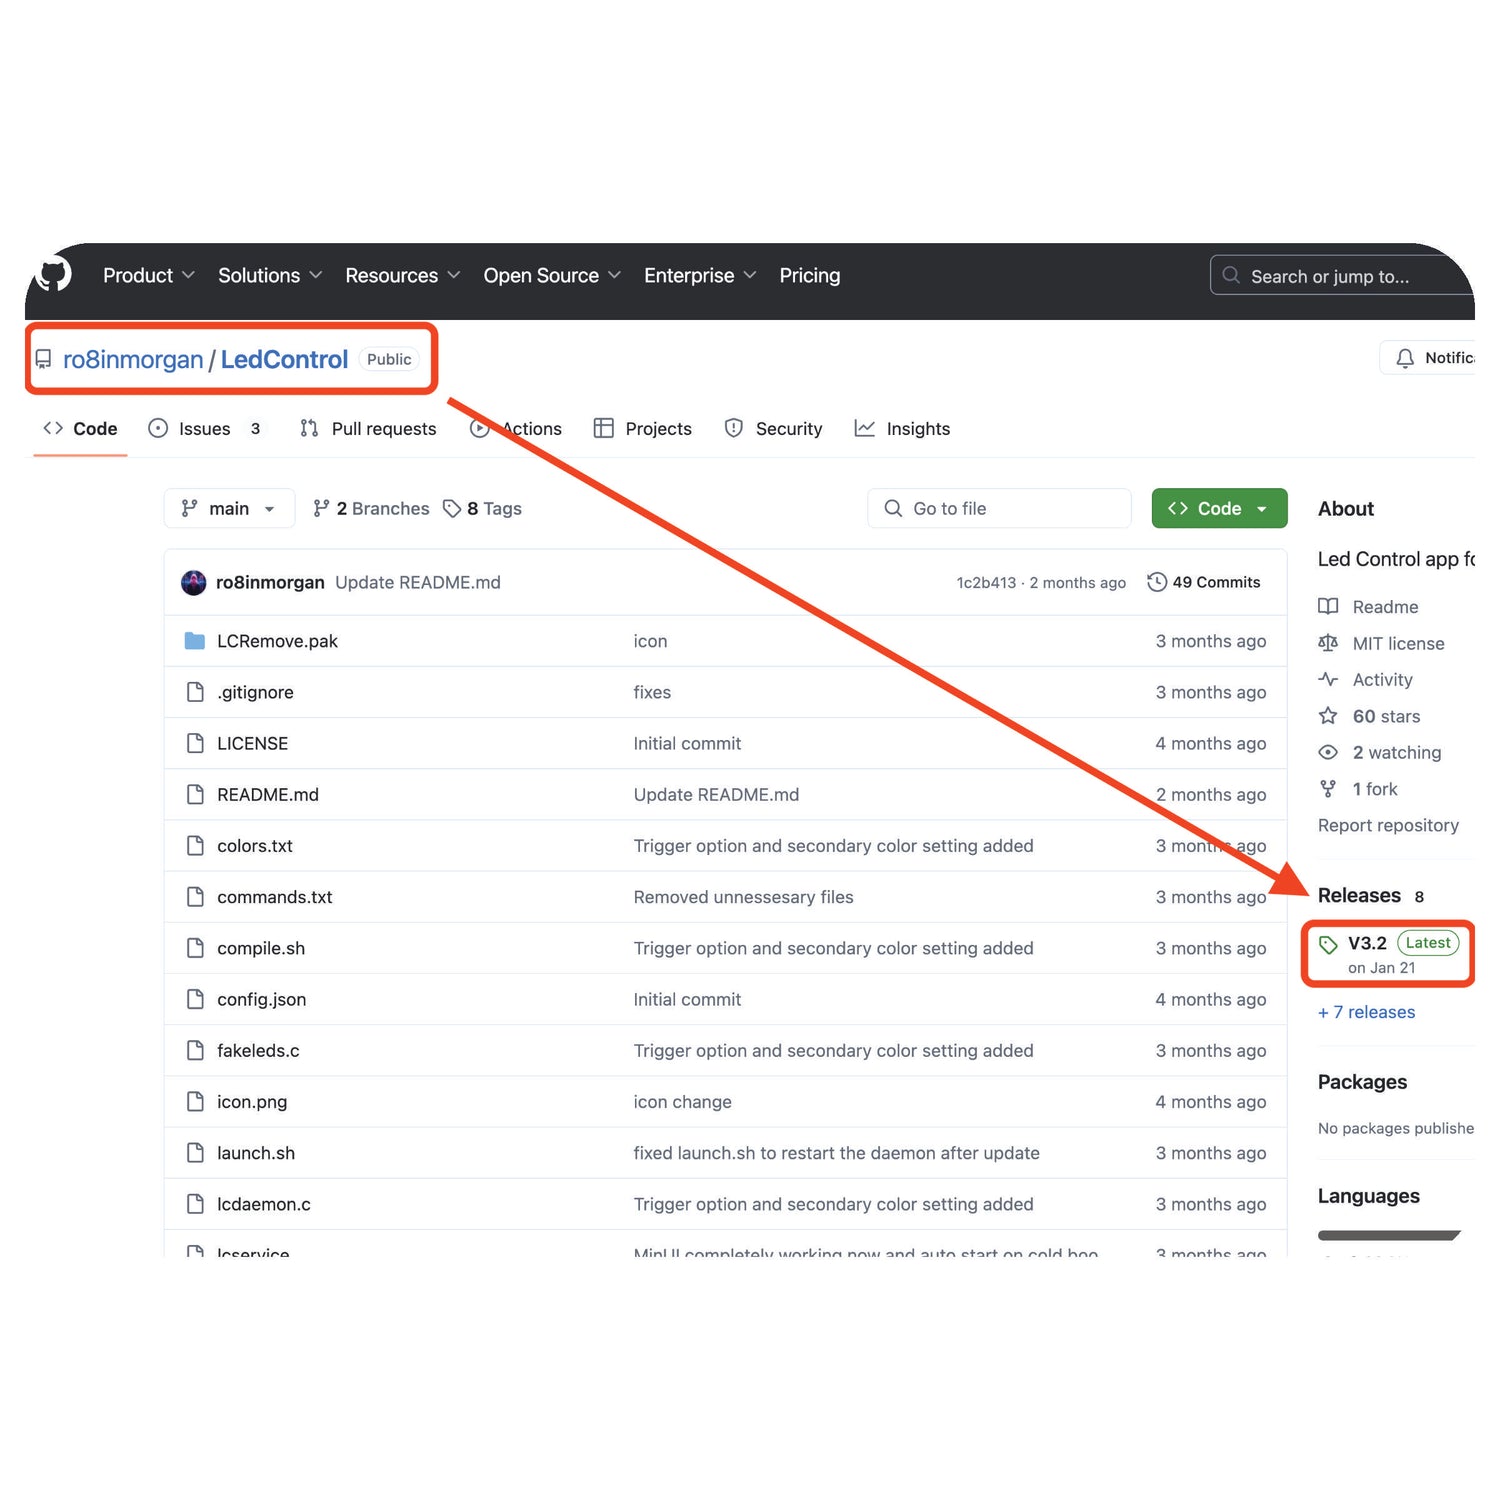
To download LedControl (3rd party software not maintained by me!), click the link below.
LedControl
Click on the latest release as shown in the image.
App - Step 3
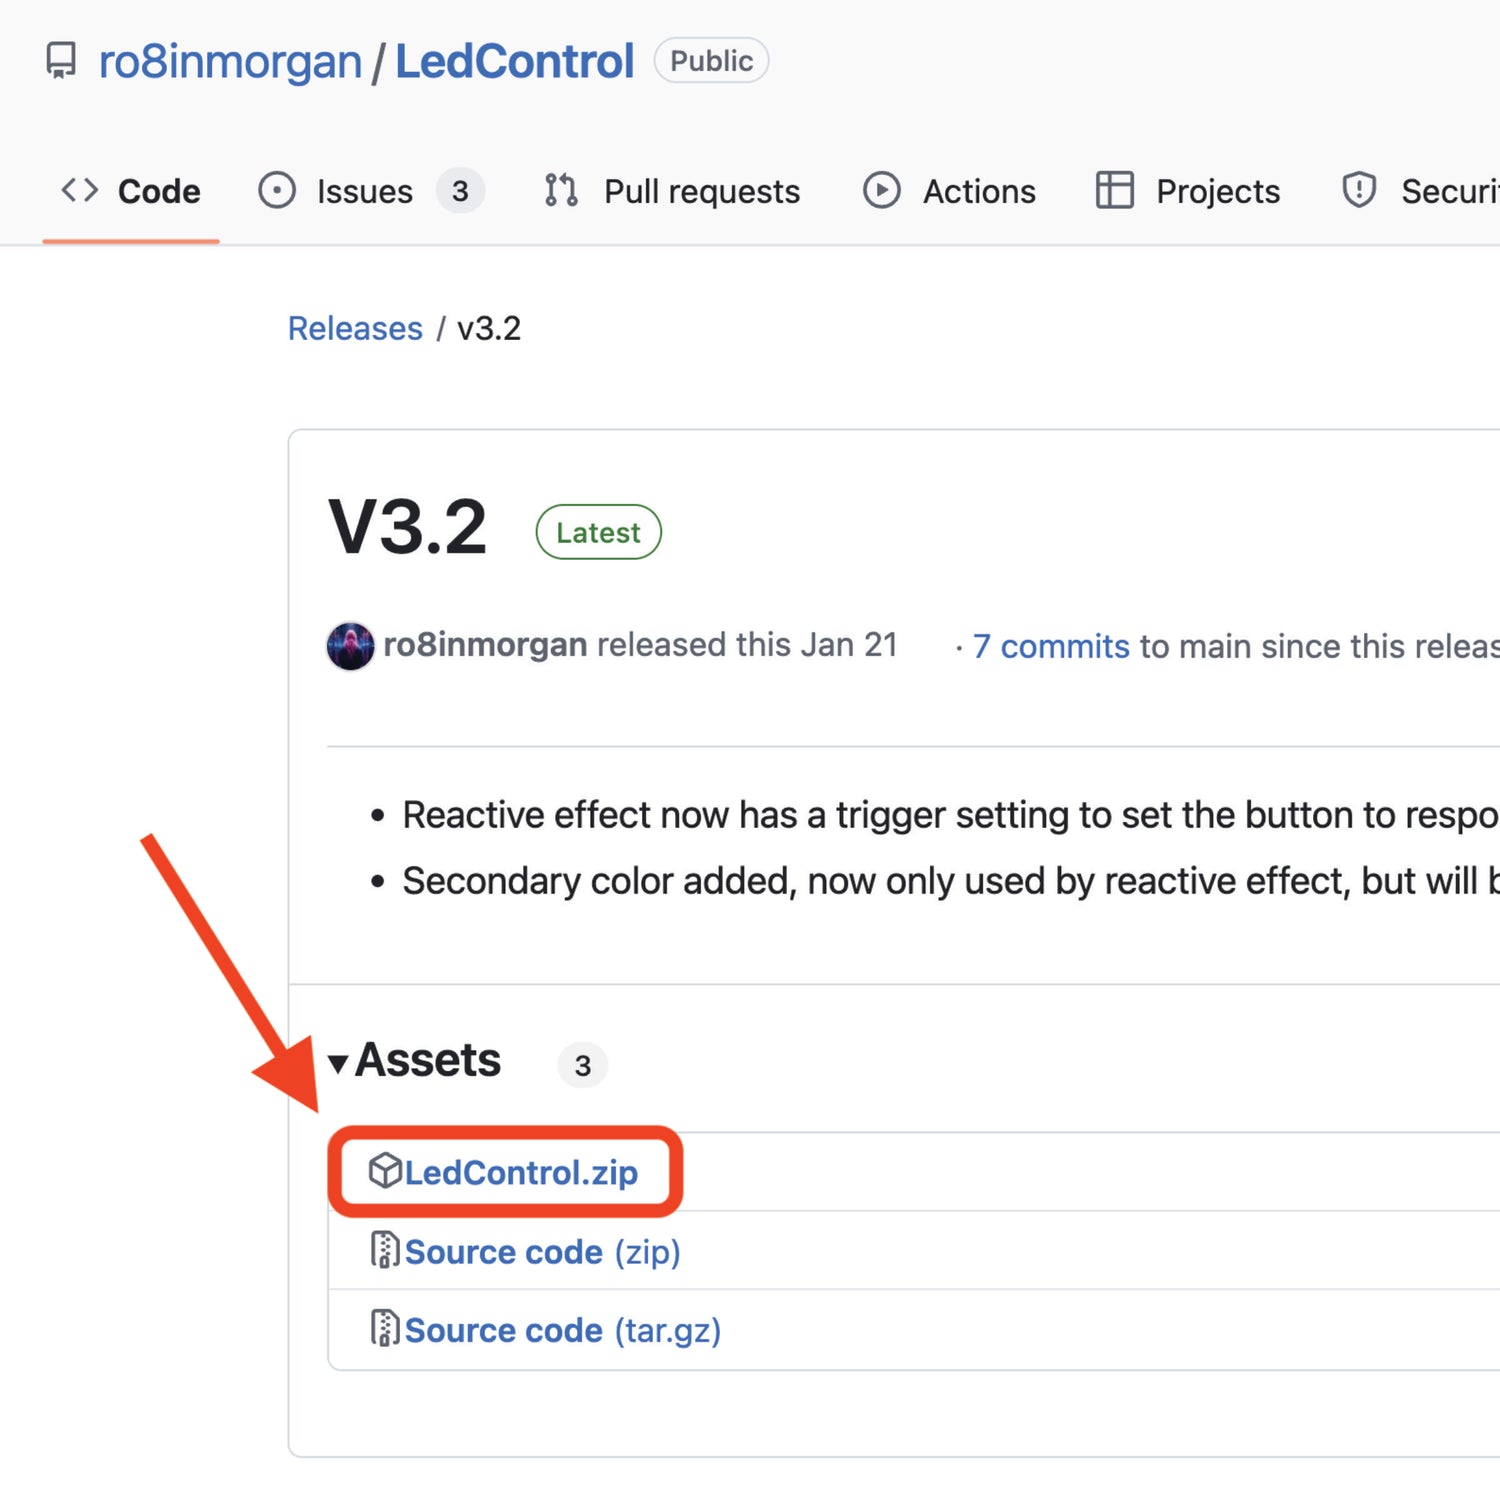
Select the LedControl.zip file to download it.
App - Step 4
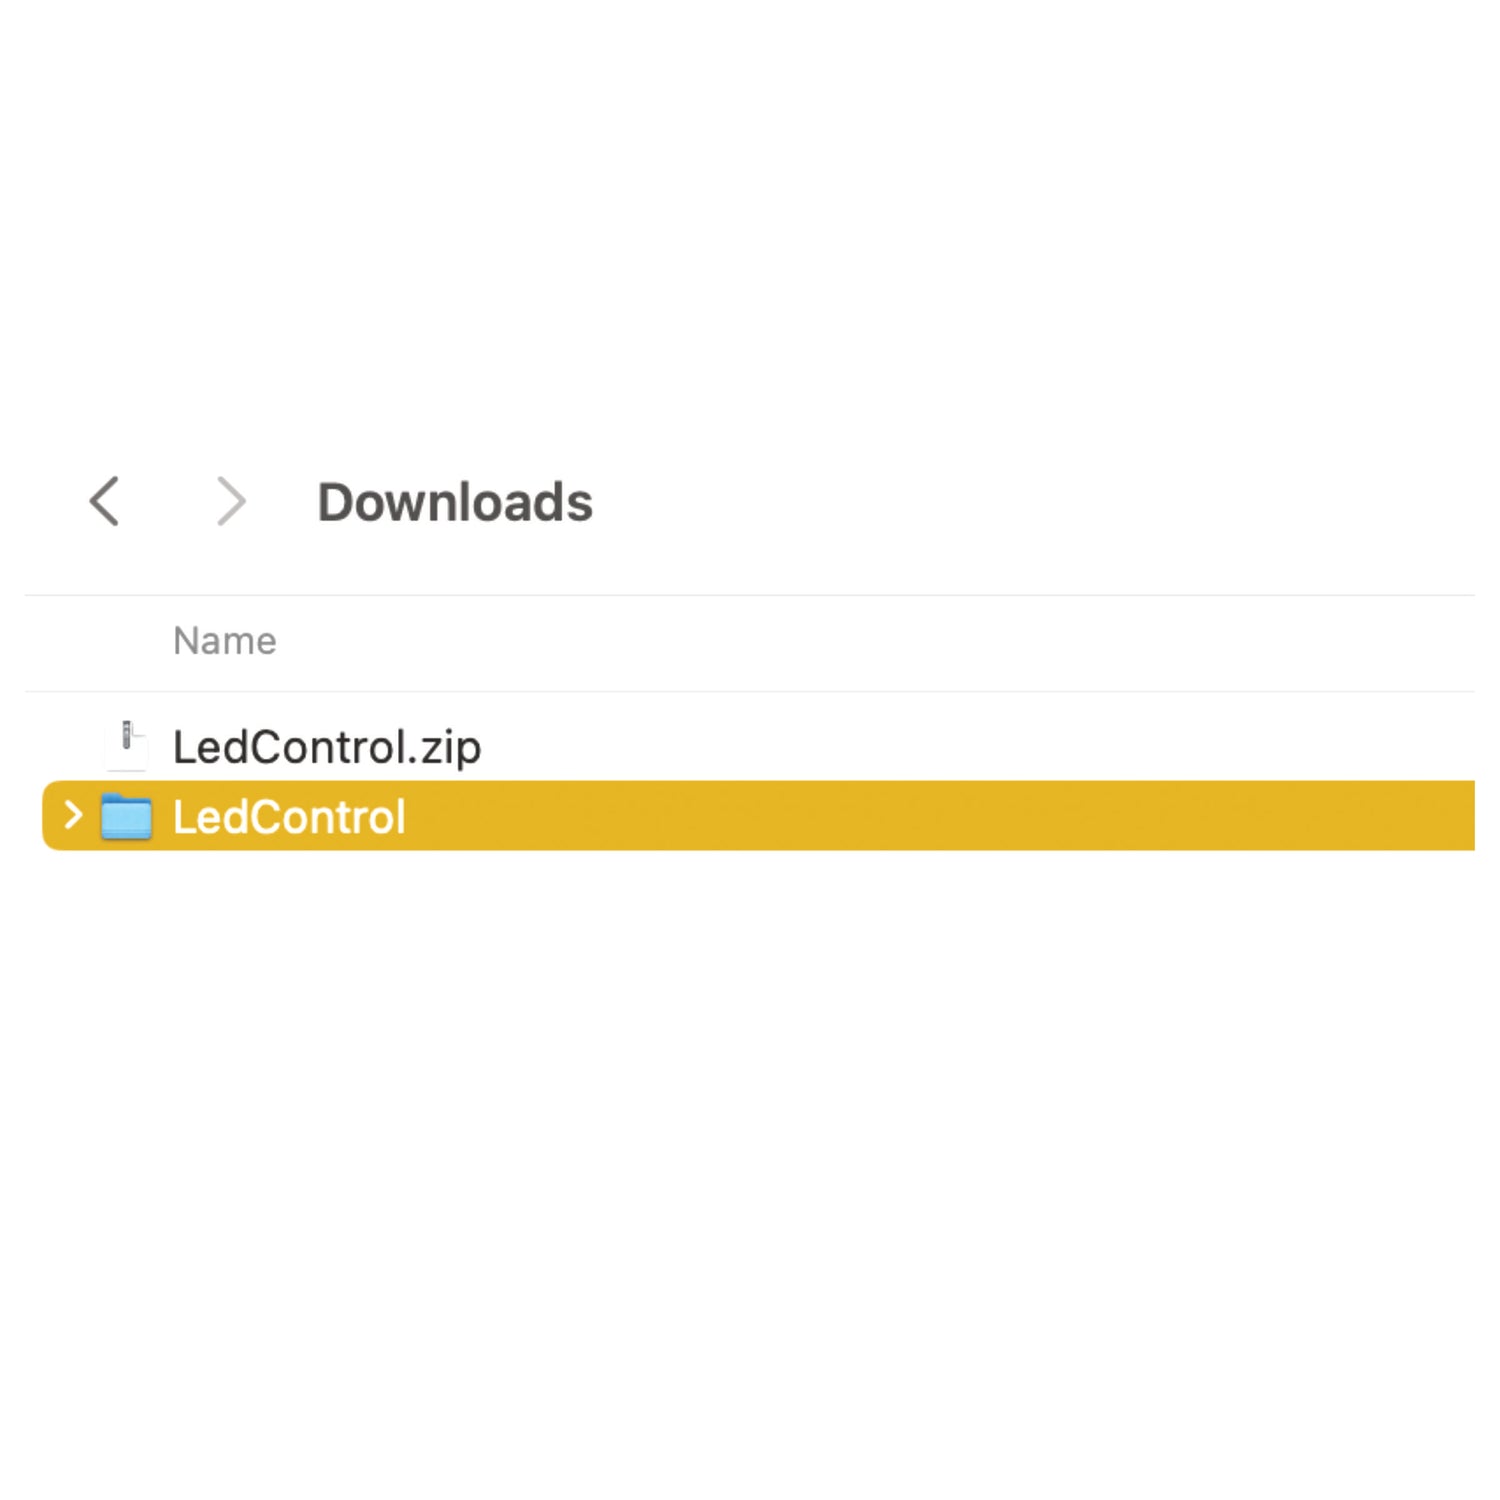
After downloading, extract the LedControl zip file by double clicking it.
This will create a folder. Open that newly created folder.
App - Step 5
Insert the SD card from the TrimUI Brick into your computer.
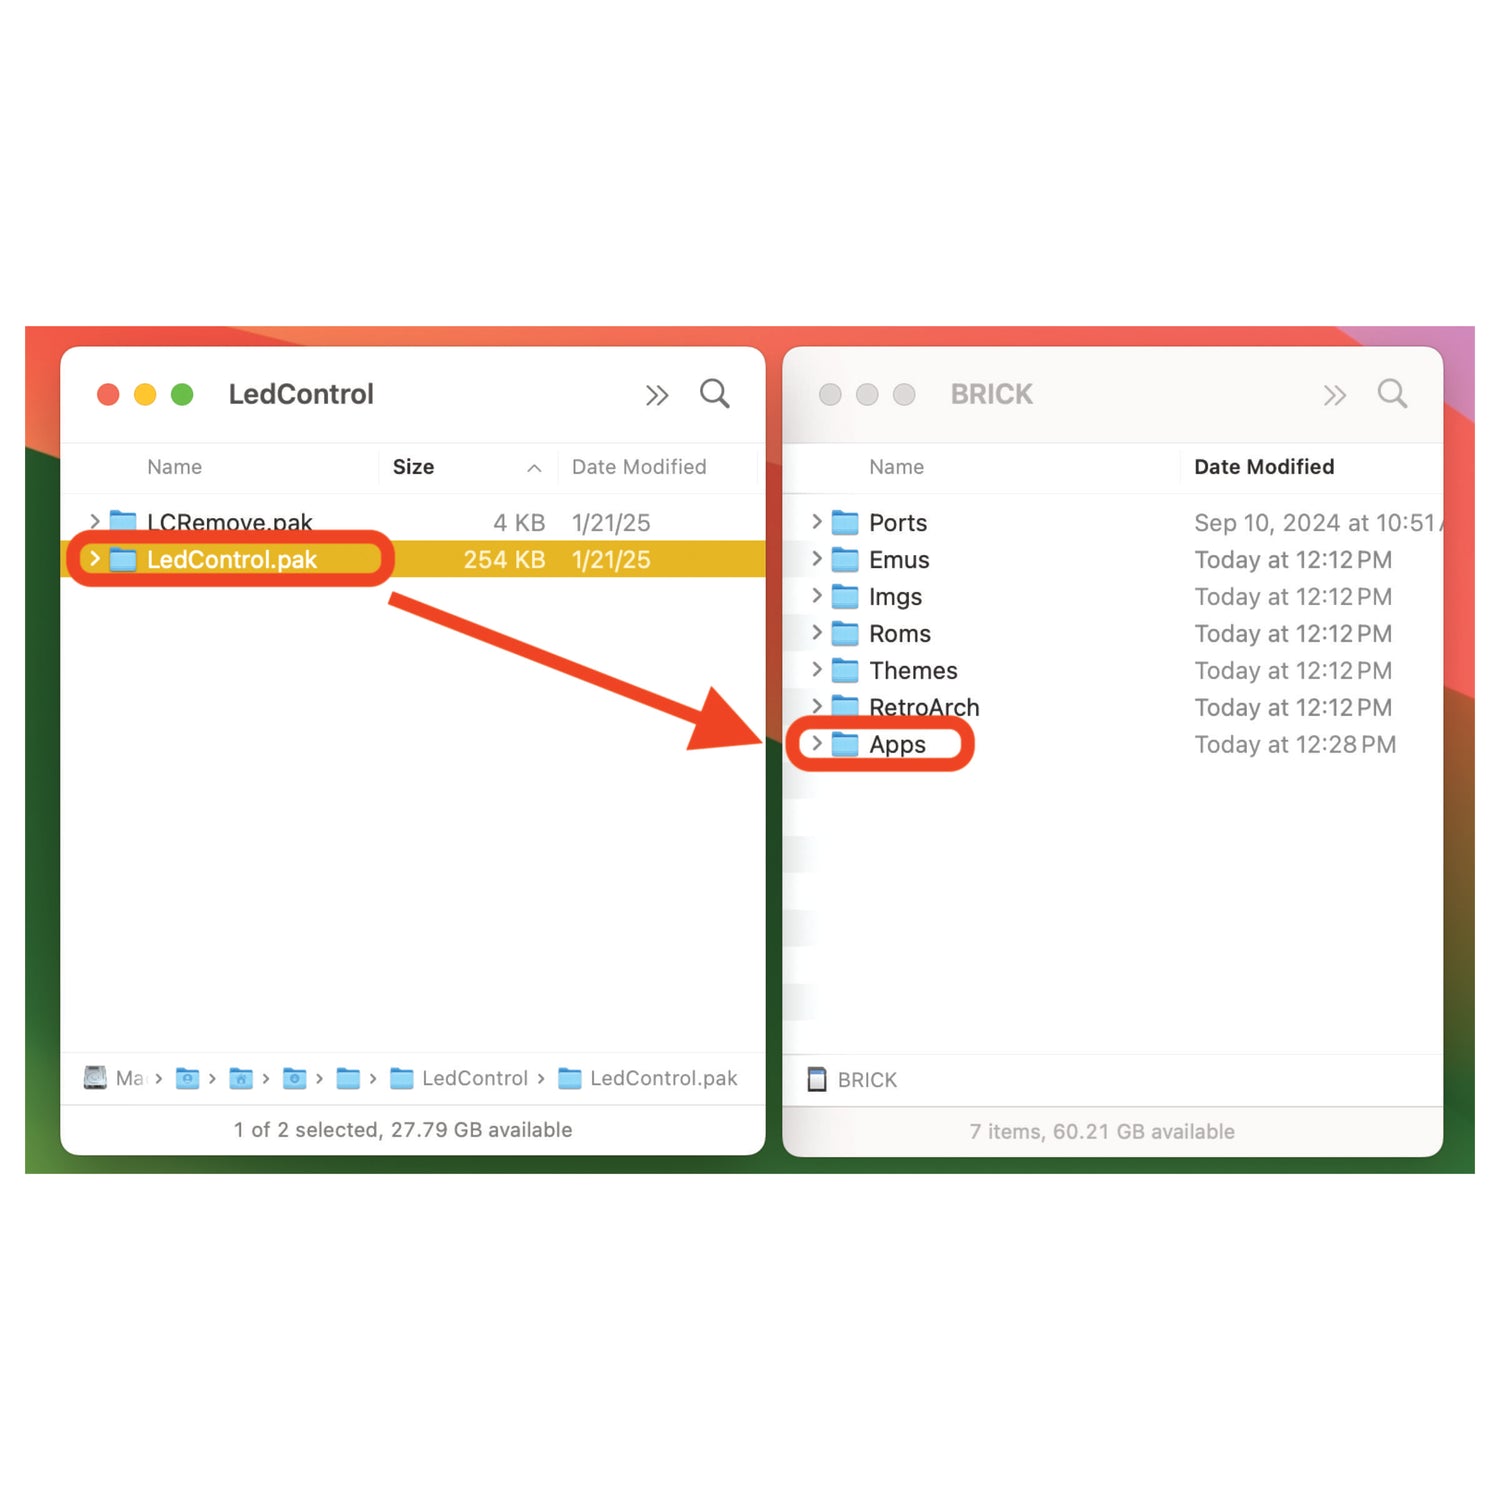
Drag the downloaded LedControl.pak folder into the Apps folder on the TrimUI Brick SD card.
(Make sure you dragged the LedControl.pak folder and not the regular LedControl folder!)
Eject the SD card once you are done.
App - Step 6
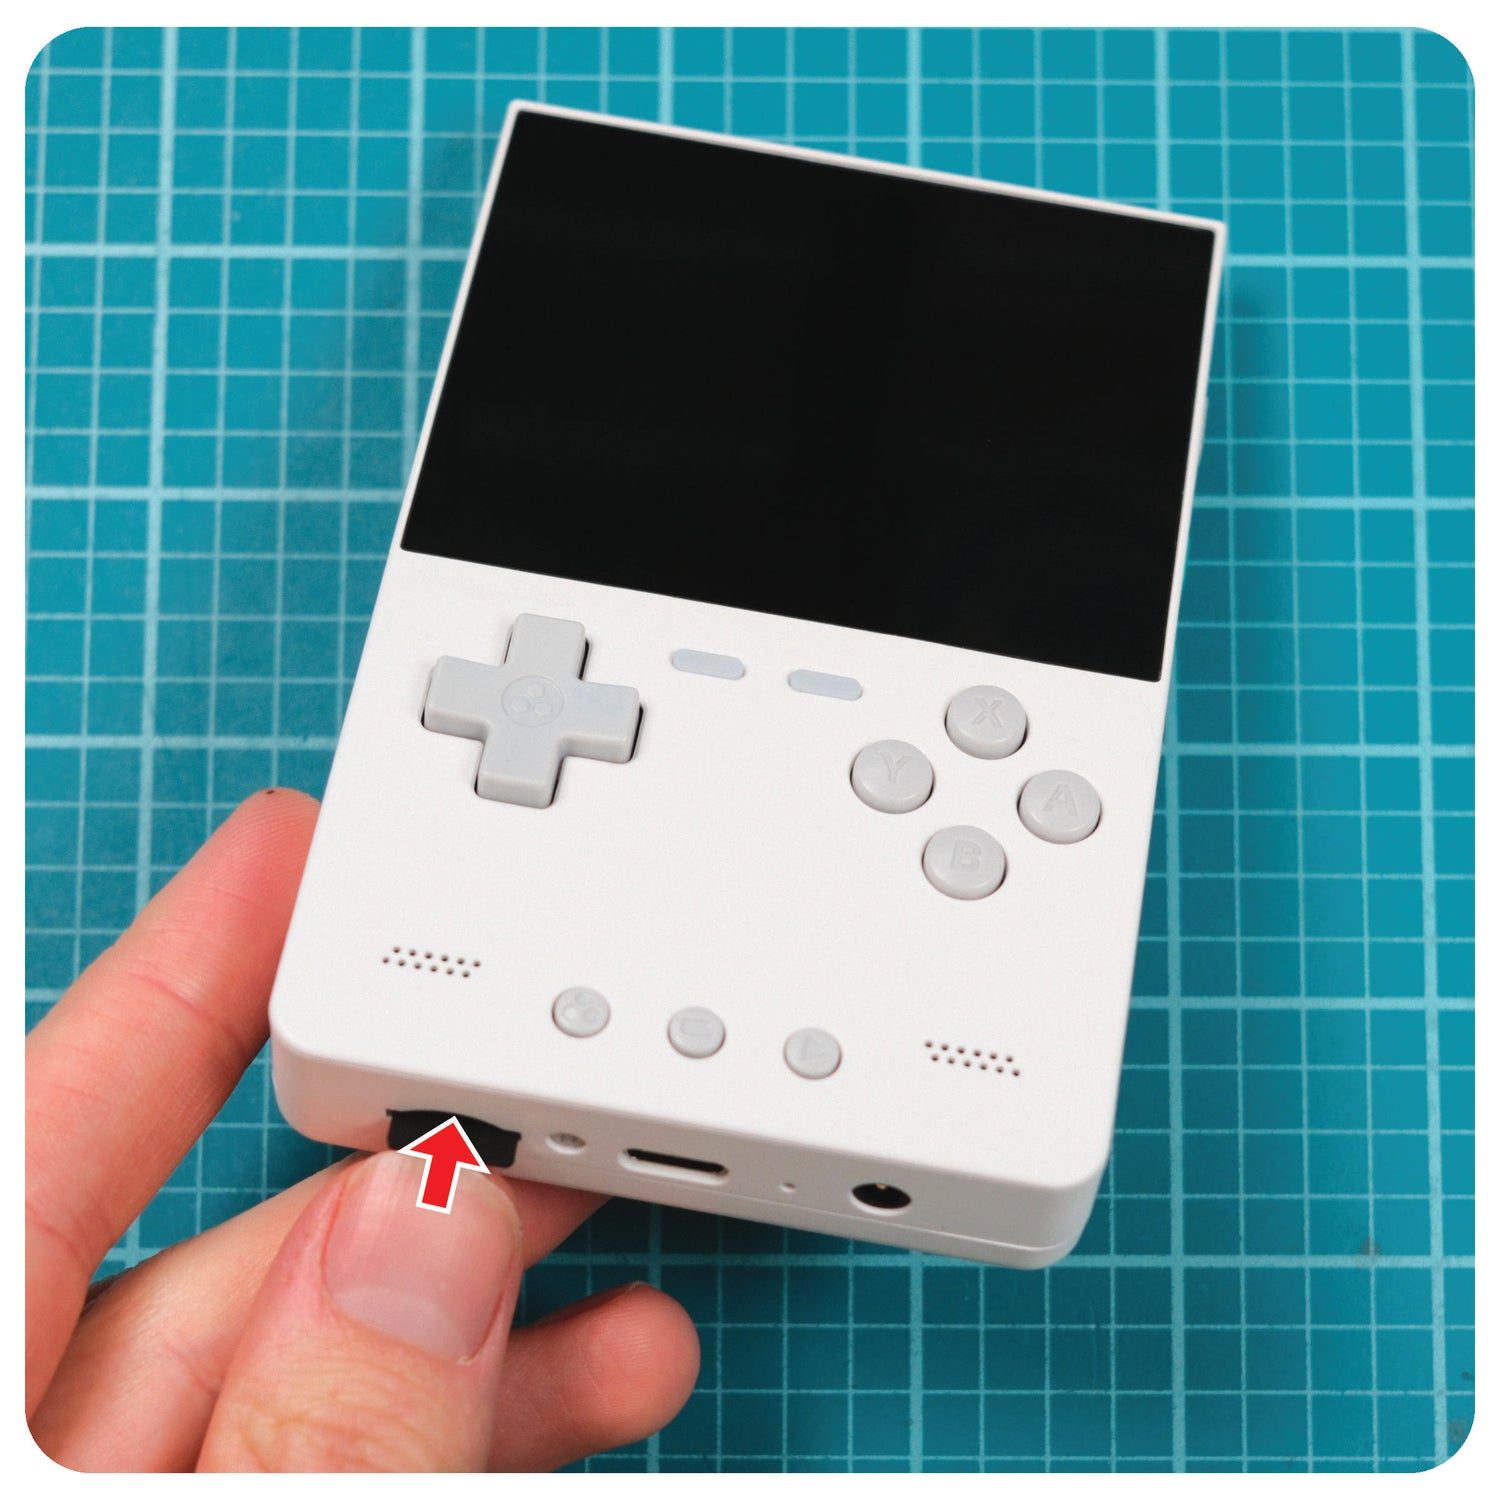
Reinstall your SD card into the TrimUI Brick.
Turn on the system.
App - Step 7
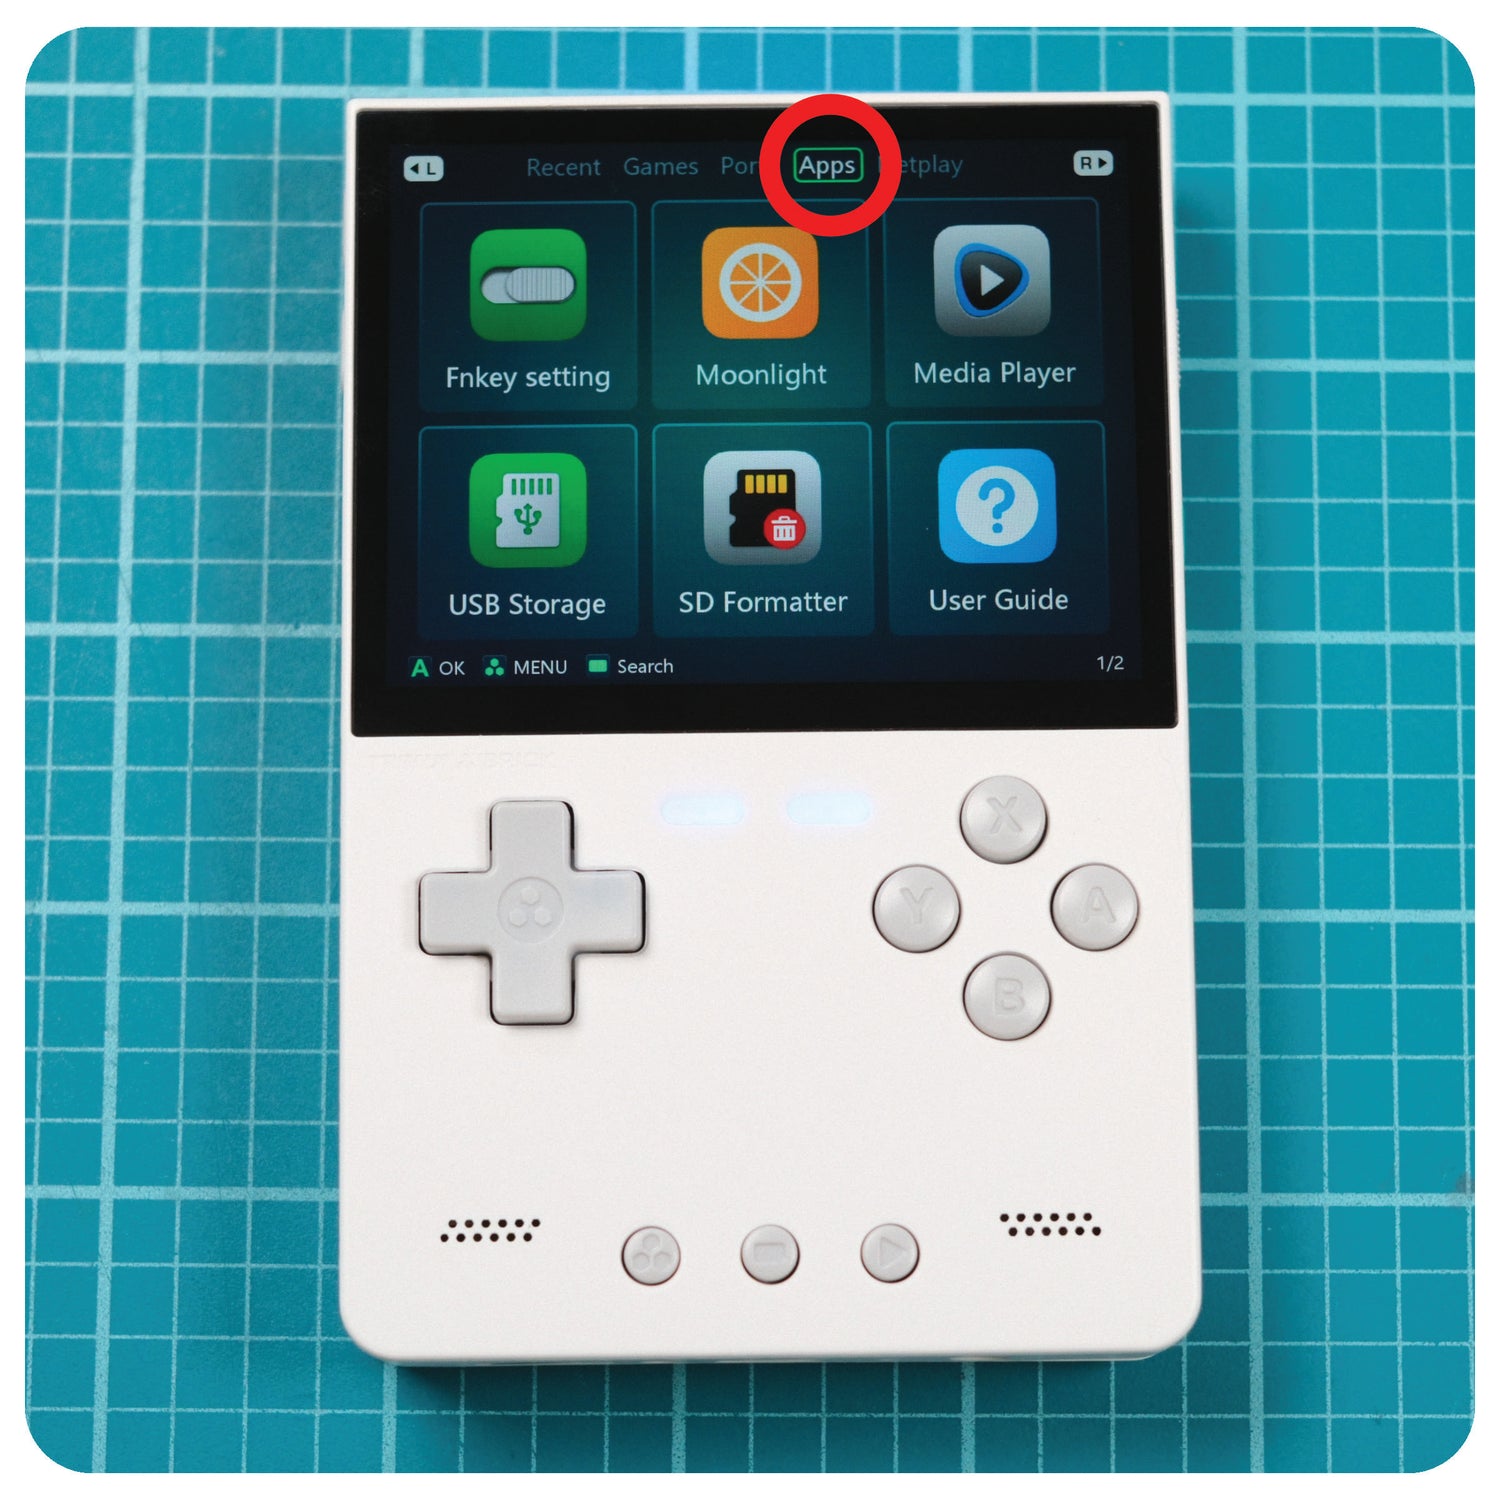
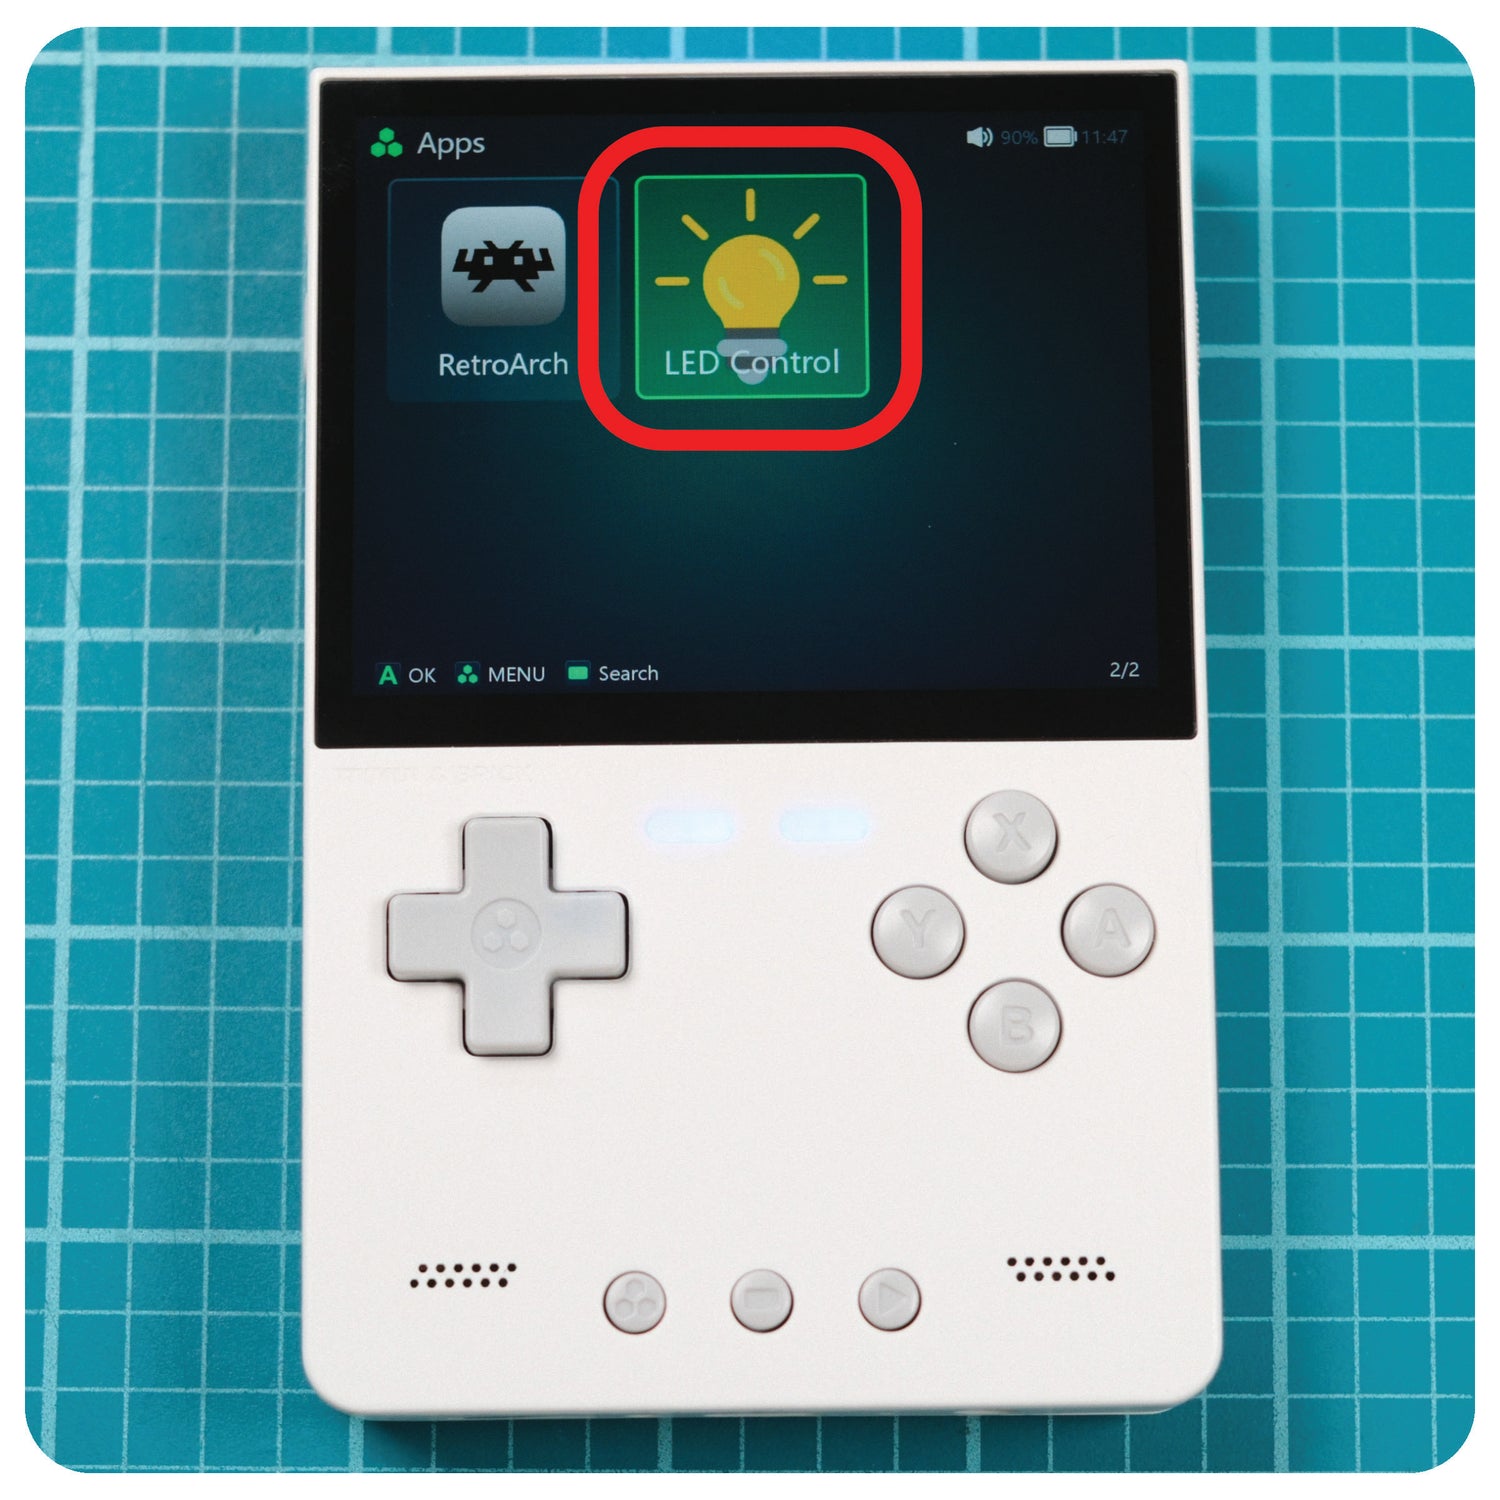
Navigate over to the Apps section.
App - Step 8
In the apps section, scroll to the right until you see the LED Control app.
Open it up!
App - Step 9
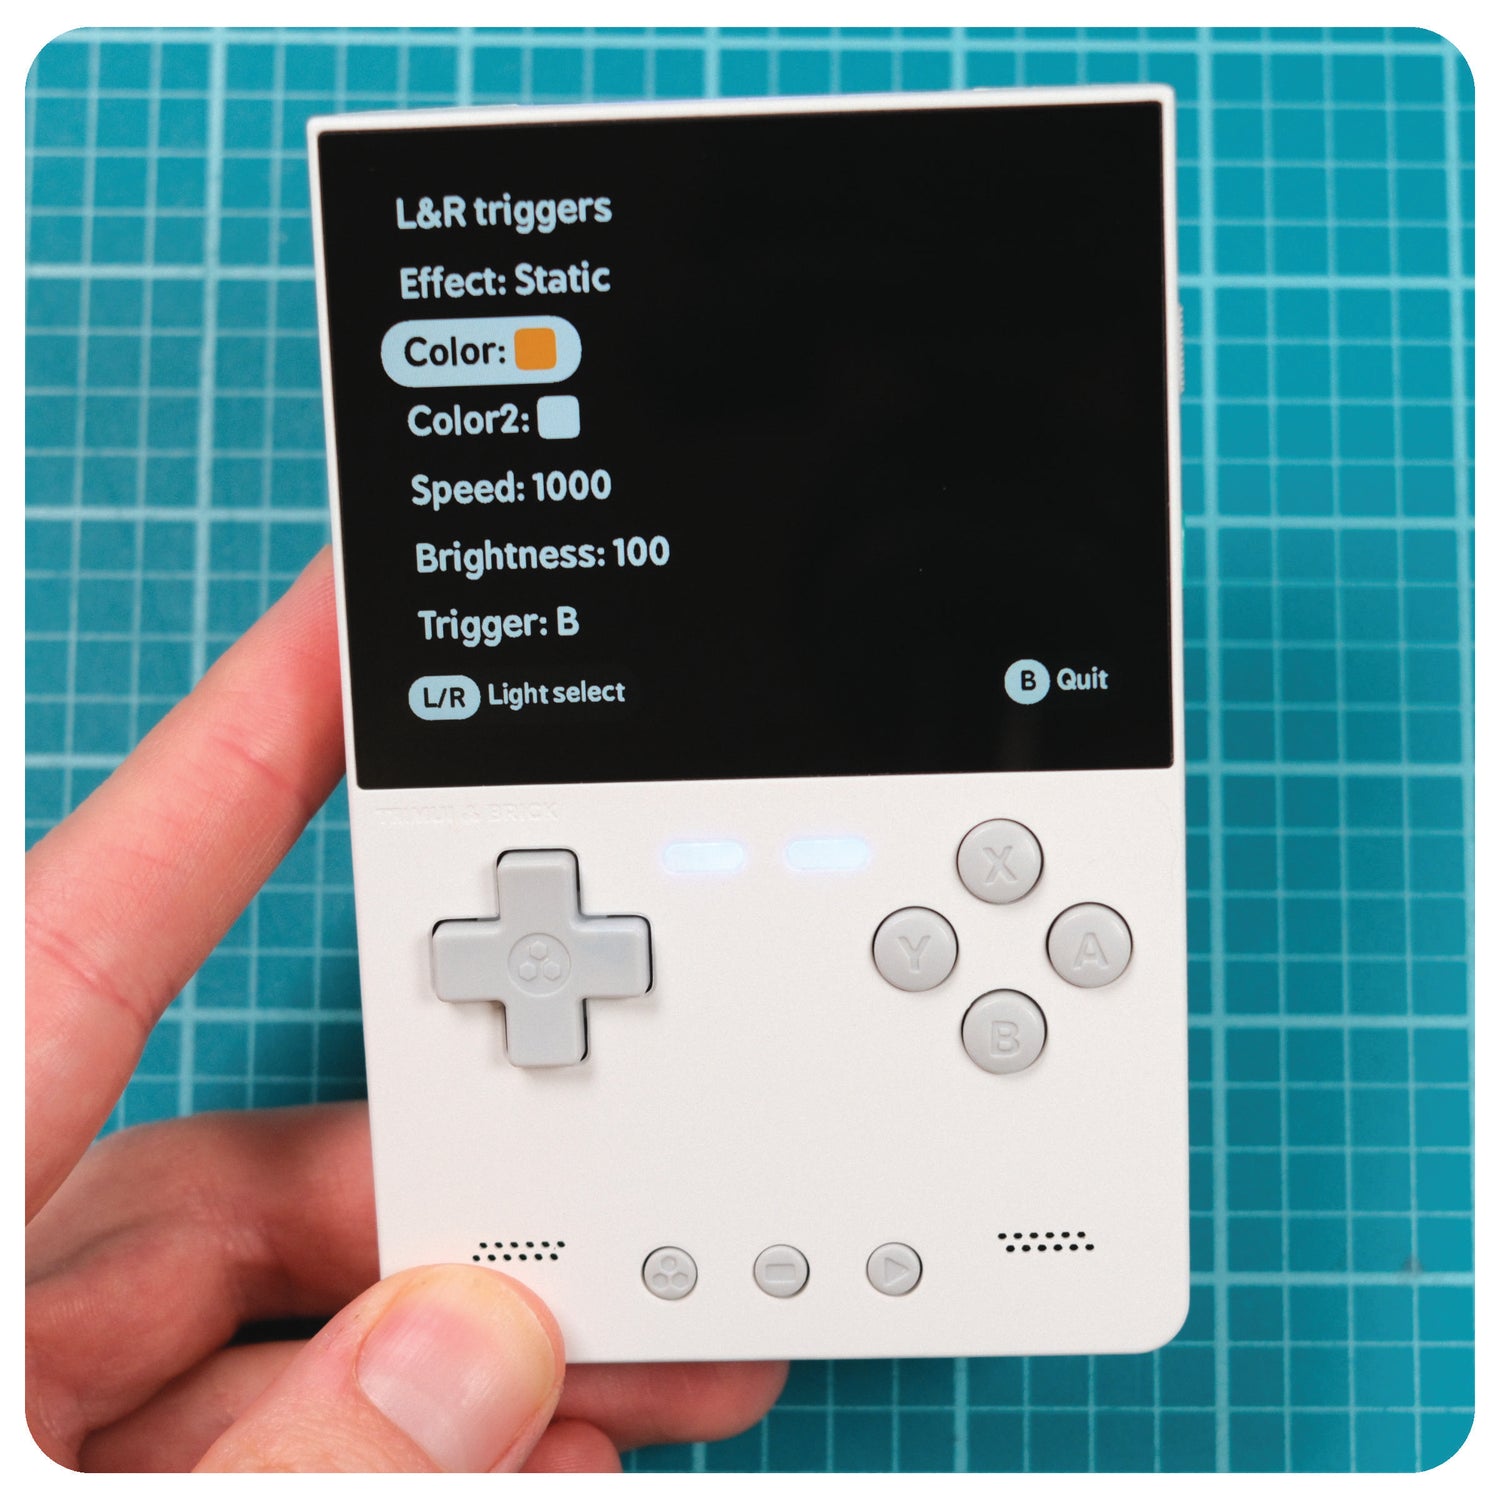
Use the app to configure all the colors on your device, and especially the colors on the new RCW buttons you just installed ;)
Select the LED's you want to change by using the L1 and R1 buttons, chose your effect, and choose your color. Speed of color changes can be configured too!
Once you get something you like, press B to quit and save the settings.
